mVTX Single User Device
Image Capture
User Manual
Table of Contents
1. General Information
1.1 Overview
1.2 Intended Use
1.3 Warnings and Precautions
2. Getting Started
2.1 Download the App
2.2 Pre-Registration
2.3 Register the App
2.4 Create your 4-Digit PIN
2.5 Review Privacy Policy and End User Agreement
2.6 Permissions to access your camera
2.7 Registration Complete
3. Using the Dashboard
3.1 The Home Dashboard
3.2 Understanding metrics on the Home Dashboard
3.3 Sessions complete
4. The More Menu
4.1 Basic Features
4.2 My Profile
4.3 My Reminders
4.4 Text Size
4.5 Language
4.6 Support
4.7 Documents
4.8 Customizing Your Experience
5. Completing a Session
5.1 Starting a Session
5.2 Enter Your PIN
5.3 Device Handoff
5.4 View the Timeline
5.5 Complete Vision Activities
5.6 Session Complete
6. Additional Information
6.1 Contact Us
6.2 Questions
6.3 Your Rights
6.4 User Manual Information
1. General Information
1.1 Overview
The mVTx application (“app,” “application,” “tool,” “system”) supports people living with eye conditions (“users”) and their eyecare professionals. The app supports people living with eye conditions and their eyecare professionals. The app features are customized to the particular user, thereby enabling a personalized user experience.
Through the use of custom device configurations, certain features of the app may be made visible to or hidden from particular users, allowing for a customized approach to the user experience.
Caution
The app should be used only by users who have been given a valid registration code by their eyecare professional. If someone completes an activity in the user's place, results are inaccurate.
1.2 Intended Use
The mVTx mobile application is intended to administer vision activities to patients in a clinic setting or home setting. The mVTx mobile application may also collect patient-reported outcomes (PROs) and survey responses.
The mVTx mobile application is intended to be used by the user and their eyecare professionals. The mVTx mobile application is not intended for monitoring, diagnostic, therapeutic or any other medical practice purpose. It does not provide medical benefits to the individual patient.
1.3 Warnings and Precautions
- Your eyecare professional will provide a registration code to allow you to gain access to the app and your assigned activities. If you have not been assessed by an eyecare professional, or if you don’t know how to perform an activity, do not take the activity and contact your eyecare professional for advice.
- Complete the activities using the app as often as instructed by your eyecare professional.
- Performing the activities included in the app does not replace regular visits to your eyecare professional.
- If an activity does not work properly, do not use it. Use the “Contact Us” button and inform us of possible issues with the activities or the app. You can also communicate any issues that affect your ability to complete the activity to your eyecare professional.
- An internet connection is required to complete Image Capture activities.
2. Getting Started
2.1 Download the App
Search for the app in the Apple App Store® or Google Play Store, and download to your mobile device or tablet. If the app is unavailable, please contact your eyecare professional.
2.2 Pre-Registration
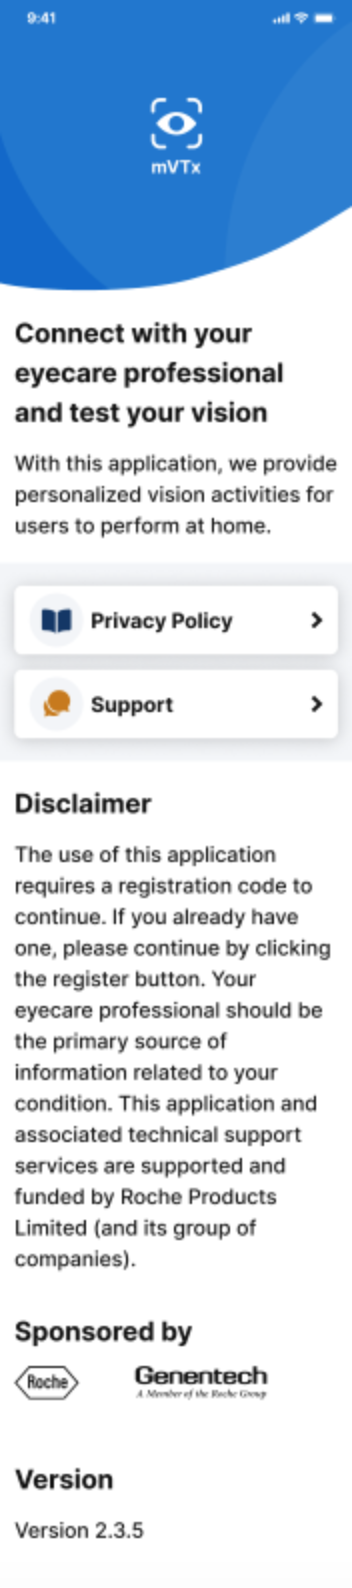
Upon successful installation, open the app and click "Register" to continue.
If an error message or notification is displayed, please follow the message instructions.
2.3 Register the App
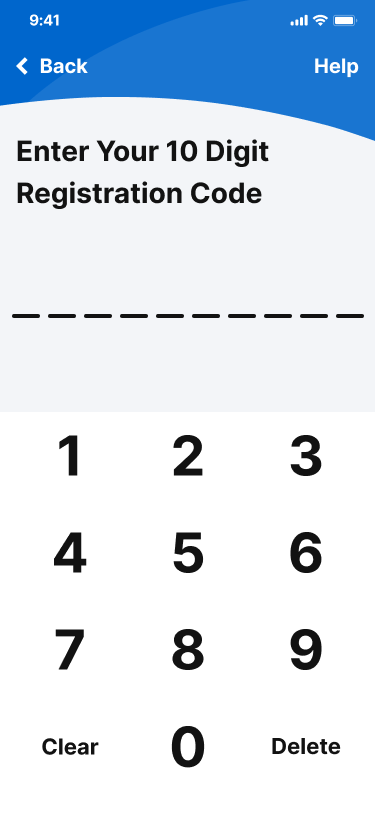
You will need a valid ten (10) digit registration code to register. This code is provided by your eyecare professional. If you don’t have a ten (10) digit registration code, please contact your eyecare professional.
Enter the ten (10) digit registration code to continue with registration.
Note:
You may use your registration code on only one device.
An internet connection is required to register your device. You will have five (5) attempts to enter your registration code correctly. After five (5) failed attempts, you will need to wait fifteen (15) minutes before you can re-attempt to register your device.
If a server-issued message appears, please wait a few minutes and try again. If the server-issued message continues, please contact support. The contact information for support can be accessed by pressing "Help."
2.4 Create Your Four (4) Digit PIN
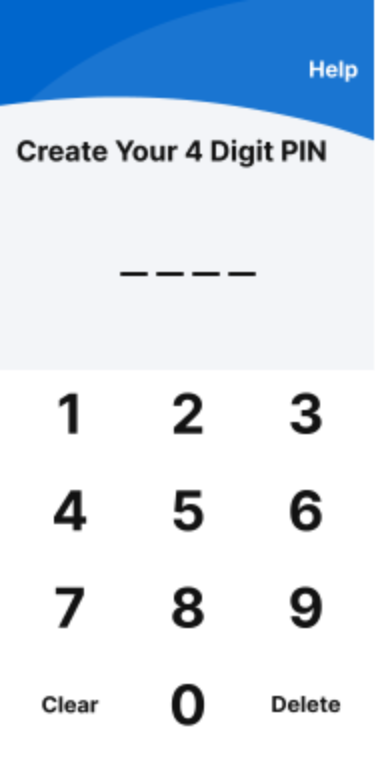
Create a four (4) digit PIN code to continue registration.
- You will be prompted to re-enter the PIN again to confirm the PIN setup.
- Upon success, you will receive a confirmation screen confirming your PIN.
Note:
Select a PIN that you can easily remember, or make a note of the PIN, as you will need to enter the PIN number each time you use the app. Try to avoid using simple PIN codes such as 1-2-3-4 or repeating the same number.
2.5 Review the Privacy Policy and End User License Agreement
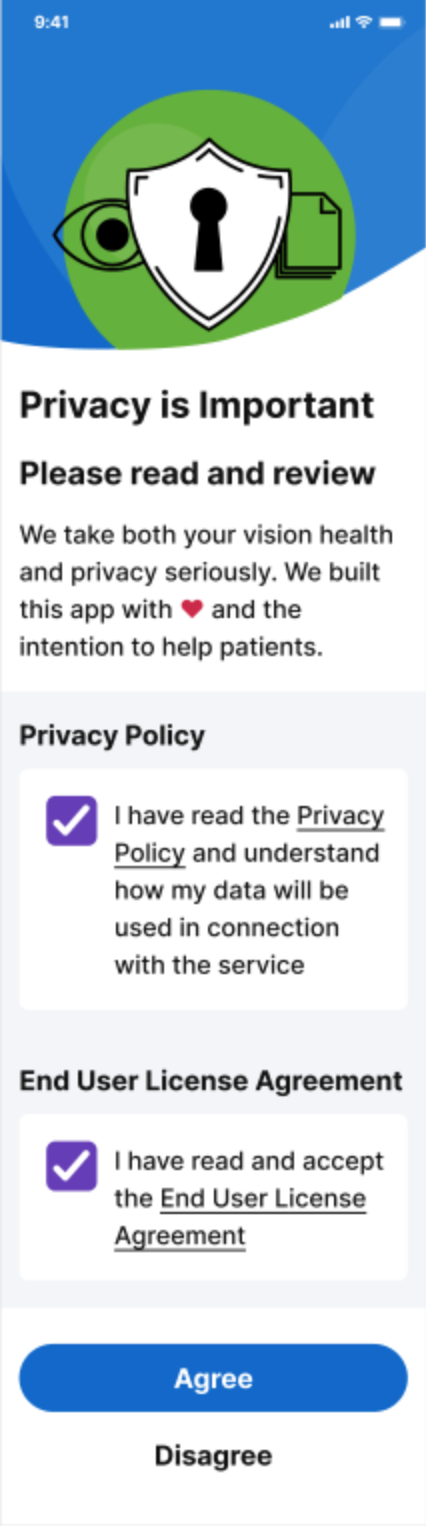
Please review the Privacy Policy and, where applicable, the End User License Agreement (EULA) carefully, checking each box and “Agree” to confirm you understand and accept the policy and terms of the agreements.
Our Privacy Policy describes the data we collect, why we collect it, and what we do with it.
If applicable, our End User License Agreement (EULA) is also provided and describes the agreement between the provider of the app, your eyecare professional and you, the user.
- Click the underlined words to review the content.
- Once reviewed, select the check box(es) to continue.
- Click “Agree” to continue.
Note:
If you disagree with the terms, you will not be able to continue with registration, and will be brought back to the pre-registration screen. Click “Continue” when you are ready to continue with the registration process.
2.6 Permissions to access your camera
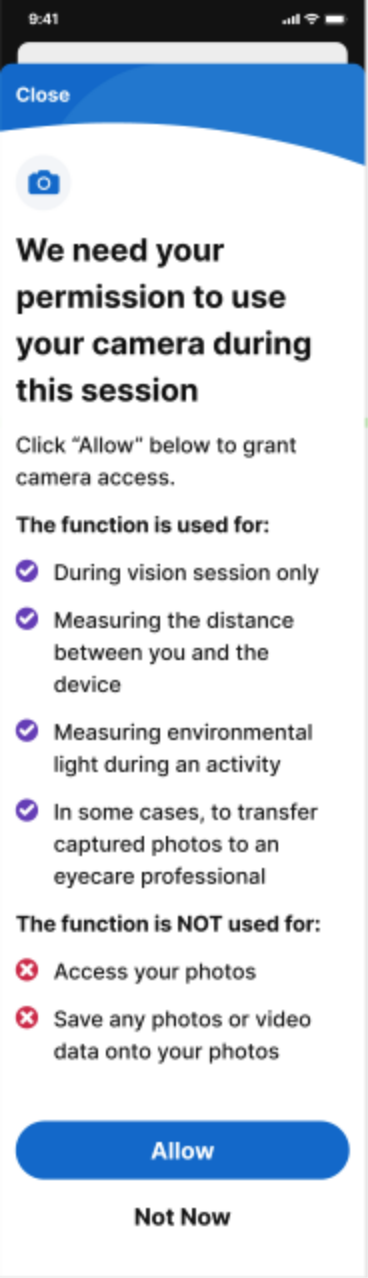
We need your permission to use your camera to collect photos of the surface of your eye. The camera is only used by the application during the activity session. Additional information on how the camera will be used during the session is listed in the application.
Click the “Allow” button to continue
Next, a pop up box will appear asking for confirmation that “mVTX Would Like to Access Your Camera,” select “Allow” to confirm.
Note:
If you select “Not Now” with respect to camera access, you will not be able to participate. Click “Allow” when you are ready to continue with the registration process.Note:
2.7 Registration complete
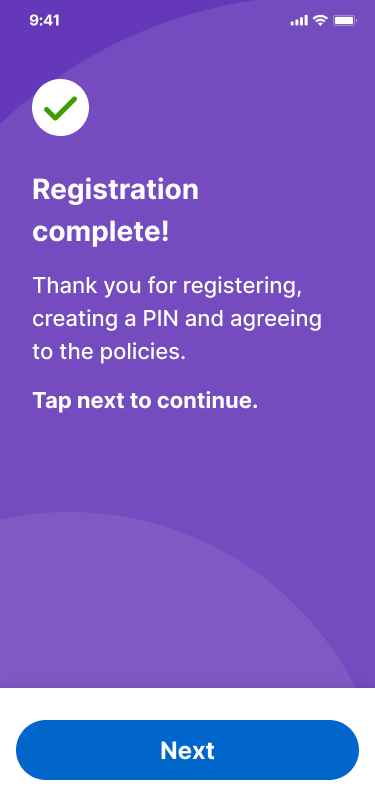
Once registration is complete you will see the “Registration complete!” screen. This concludes the registration process.
Click “Next” to continue.
3. Using the Dashboard
3.1 The Home Dashboard

The Home Dashboard generates custom messages for you based on the activities you will complete. Please read each message carefully and follow the prompts.
From the Home Dashboard you may:
- Click “Start” to begin a session and complete your activities.
- Click “More Menu” to view additional information found within the app.
The version number of the app is shown at the bottom of this screen. You may need to refer to the version number if asked by a member of the study team.
3.2 Understanding metrics on the Home Dashboard

The Home Dashboard will update to remind you when it is time to complete a session. As an example, a green check mark and a custom message will appear at the top of the screen to indicate that you have performed the image capture activity. |
In addition, you are presented with a “Metrics” section. “Total Sessions” indicates the total number of completed image capture sessions. Note that a session may include more than one (1) activity.
Notifications are not required, however, after completing the first session, the “Set Reminders” button will appear in the Notifications section if you have not already set-up reminders in the “More Menu.”
Surveys will become available to gain your feedback about the app, and will be visible on the home dashboard under “Notifications.”
Click “Surveys” to view the latest survey.
Note:
Surveys should be taken in online mode to ensure that data is synced with the server upon completion.
3.3 Sessions complete
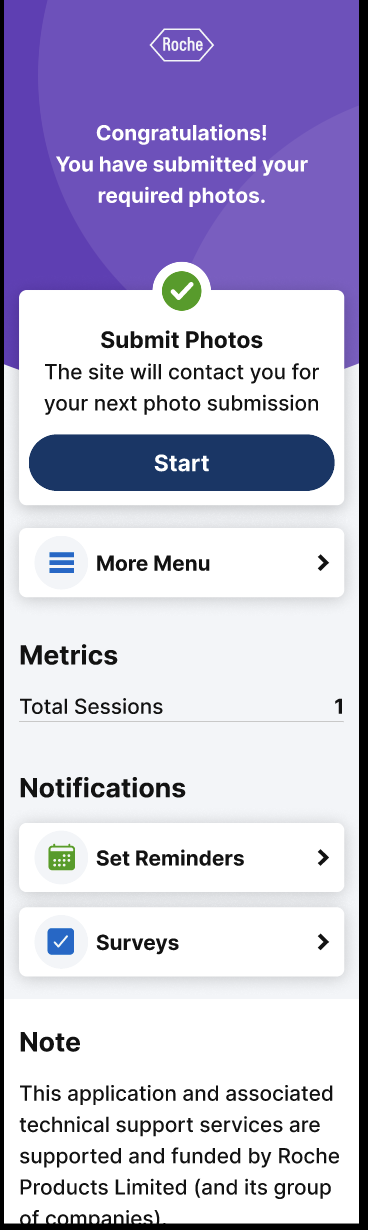
Upon completing the image capture activity the Home Dashboard screen will update to let you know that the photos have been submitted. The background will change from blue to purple, and a green check mark will appear at the top of the screen. These updates indicate that you have completed the required number of sessions for the week.
The “Total Sessions” count will increase by one (1) upon the completion of each session.
At the start of each collection time, the upper part of the Home Dashboard will refresh to its original state, with a custom message and a blue background. Follow the prompts to continue with the usage of the app.
Note:
Custom messages may be shown at the top of the Home Dashboard. These messages are there to help you continue with the activities according to the schedule determined by your eyecare professional.
4. More Menu
4.1 Basic Features
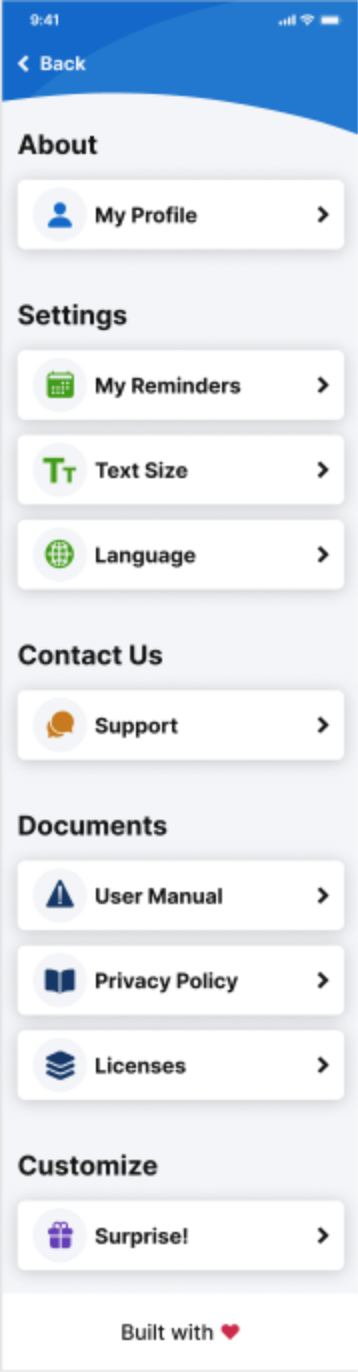
The “More Menu” will display features based on the available activities, configuration, and the usage of the app. The items below describe general “More Menu” features that are expected to be available to all users.
The icons representing features within the “More Menu” are grouped by color, according to their relative section.
- “My Profile” provides more information about your registration code and device.
- “My Reminders” creates and edits notifications.
- “Text Size” provides information on how the app’s text size presents and how it can be updated.
- “Language” provides you with the ability to customize the app’s language, depending on your device’s language options.
- “Support” indicates the different contact methods for study participants and study coordinators.
4.2 My Profile
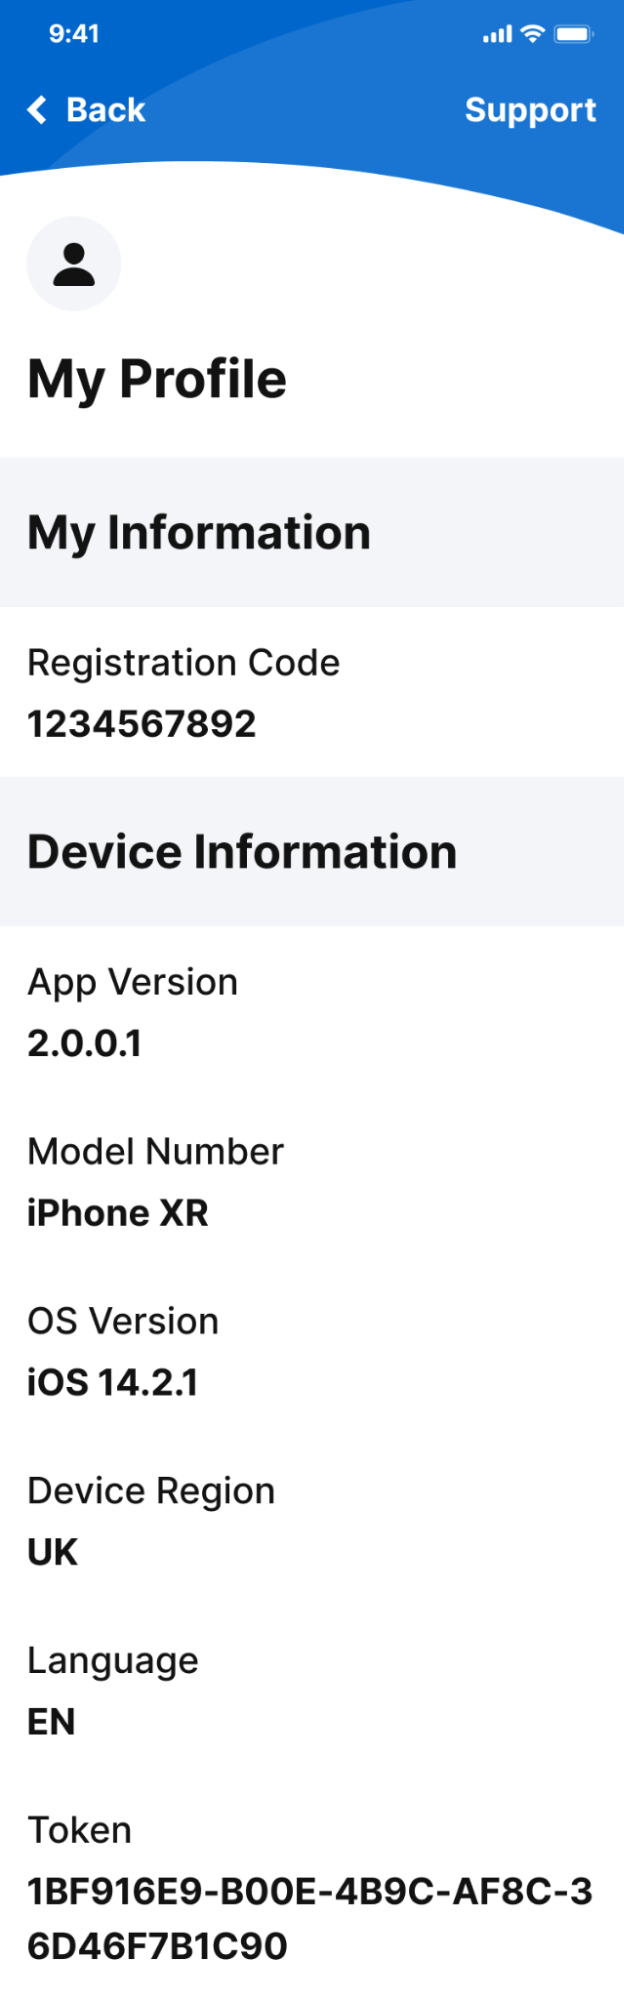
Click “My Profile” to view more information about your registration code and device, including app version number, device model number, device OS version, device region, device language, and device token. Please note, Customer Support may ask you for the last six (6) digits of the device token in order to authenticate your access during a support request.
4.3 My Reminders
The image capture activity does not require reminders, though the app is built to support reminders.
Click “My Reminders” to set or change the timing and frequency of reminders sent to your device.
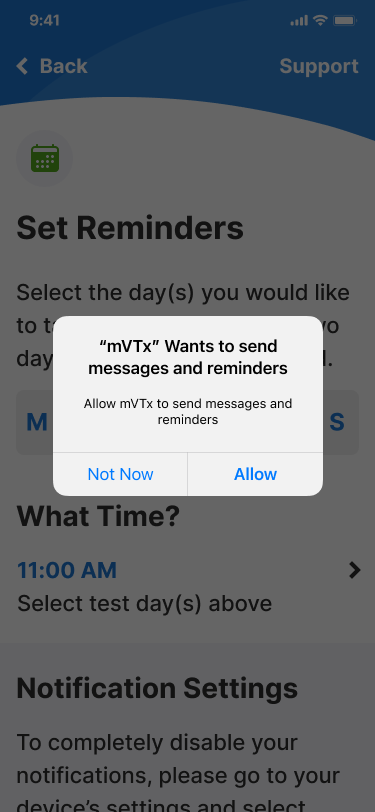
Before setting reminders, the device may ask you to allow the app to send messages and reminders. Click “Allow” to permit messages and reminders.
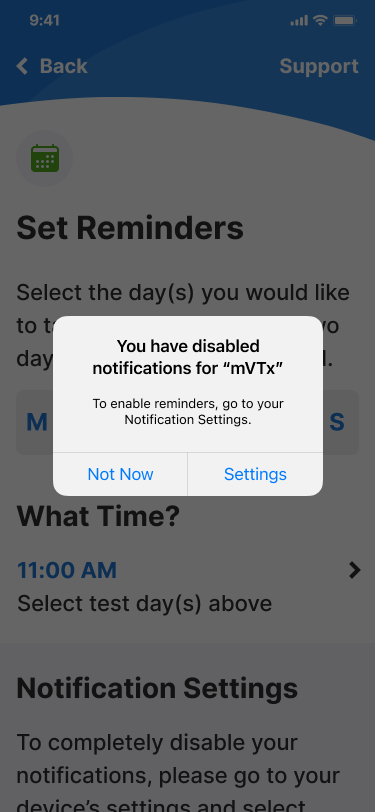
Click “Settings” to navigate to the app’s settings in order to turn on notifications and allow reminders to be sent to your device.
If you click “Not Now” reminders will not be sent to your device by the app.
If you decide later that you would like to receive reminders, you can enable this from the app’s settings.
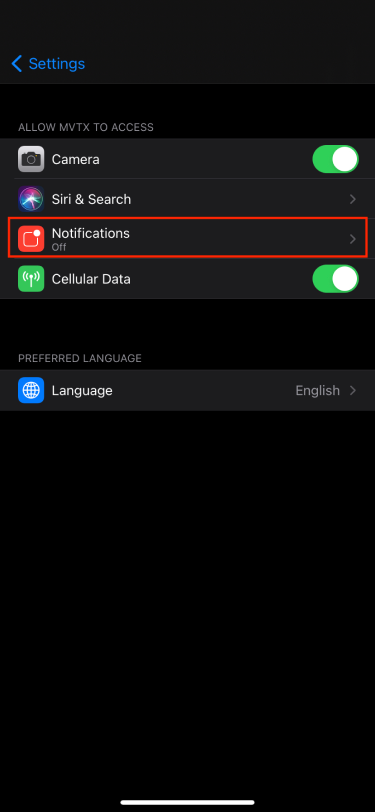
Click “Notifications” to allow reminders for the app. After allowing, return to the app to schedule reminders.
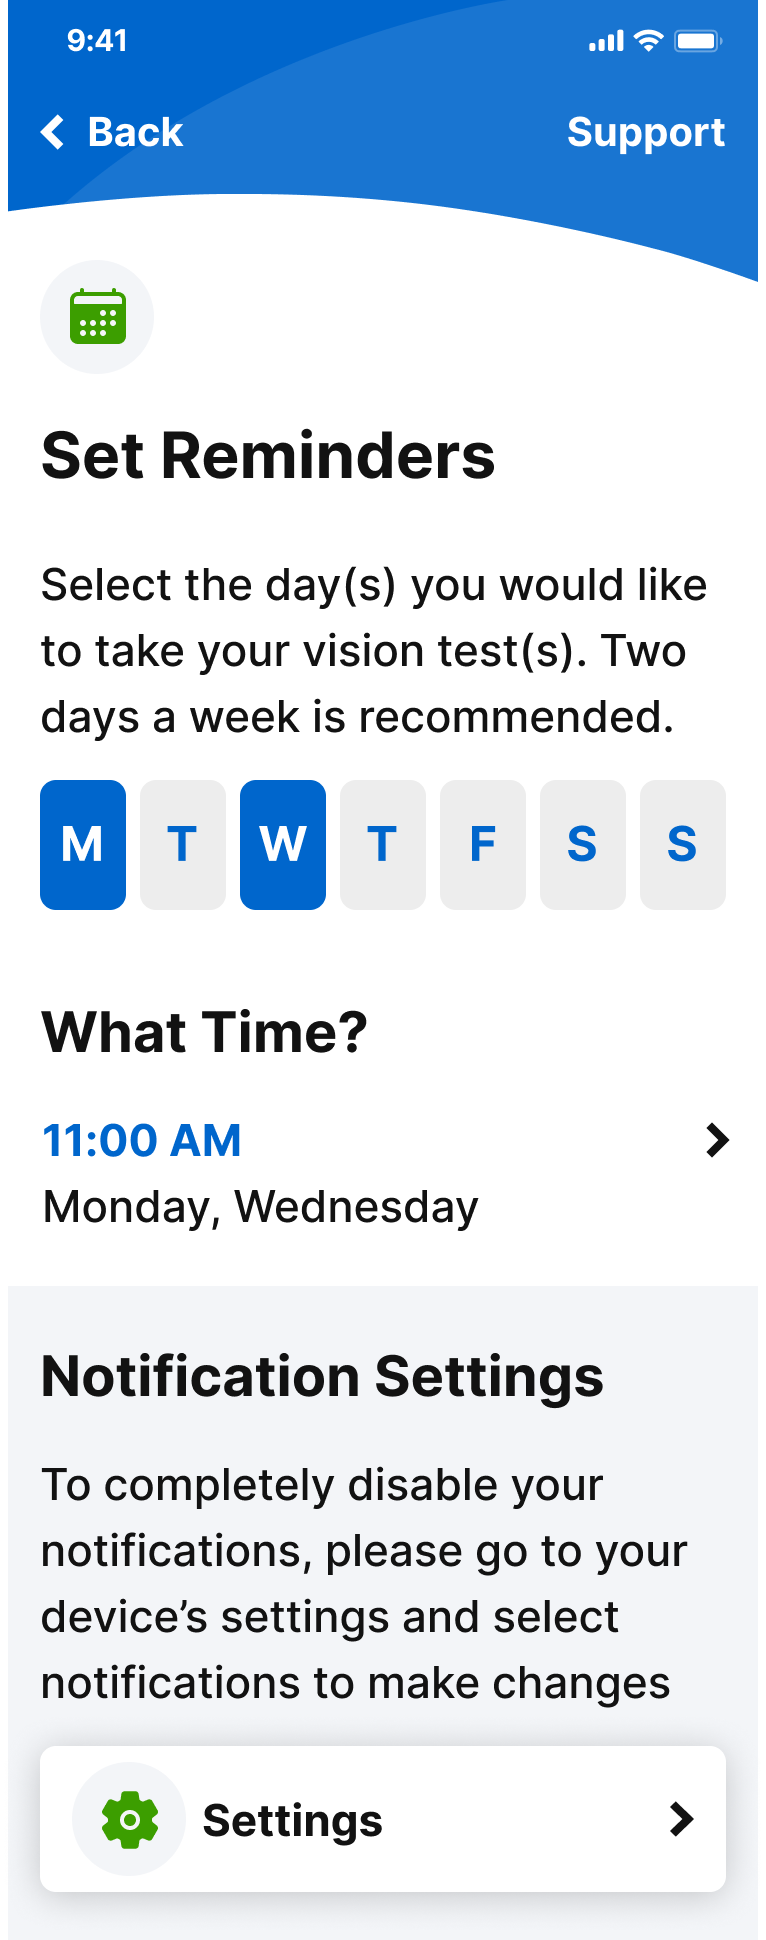
Next, select the days of the week that you would like to schedule a reminder.
M = Monday
T = Tuesday
W = Wednesday
T = Thursday
F = Friday
S = Saturday
S = Sunday
Click the symbol “>” to schedule the time for your reminders. A notification will be scheduled to go off at the time specified on the days selected.
4.4 Text Size
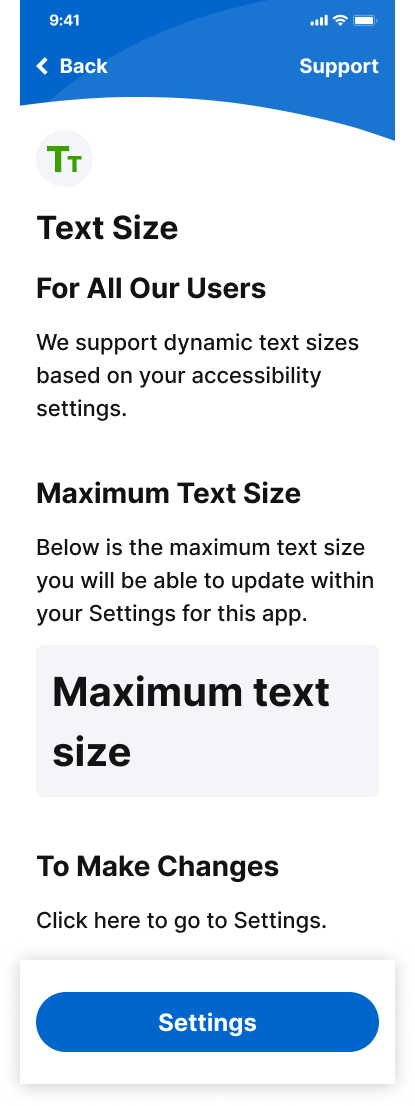
The app is built to support text sizes based on your device’s accessibility settings. The app will automatically adjust to the text setting selected in your device.
If you need to increase or reduce the font size used within the app, you must update your accessibility settings in the device.
To do this, click “Settings” to navigate to your device’s accessibility settings to review or change your preferred text size.
Note:
Adjusting the text size from within your device’s settings will change the size of the text used within the app as well as the text size used throughout the rest of the device
4.5 Language
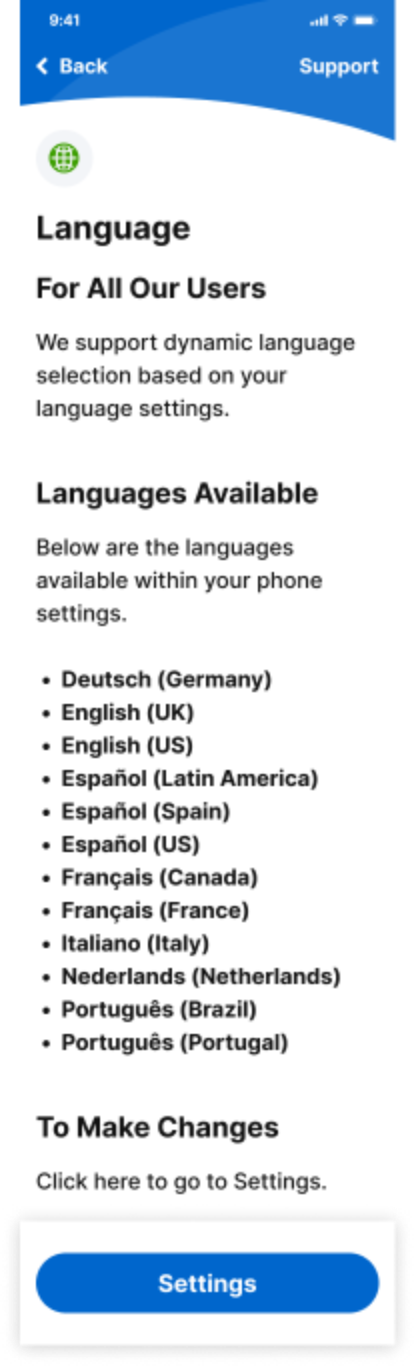
The image capture activity currently only supports English, though the app is built to support the languages listed in the “Language” section.
Note:
Adjusting the language within the app does not change the language used throughout the rest of the device. Only the language used within the app will be changed.
4.6 Support
Depending on your device’s identified region, certain information will be displayed. For example, the app will display a phone number for support in the device’s region. Information in the “Support” section indicates the different contact methods for study participants and study coordinators.You will be asked to provide your registration code and possibly the last six (6) digits of your device token (see Sections 4.1 and 4.2 for more details).
Caution:
For immediate - medical attention, please contact your eyecare professional.
4.7 Documents
Depending on the app’s registration code and configuration, certain information will be displayed in the “Documents” section.
- Click “User Manual” to access a digital version of the app’s User Manual.
- Click “Privacy Policy” to access a digital version of the “Privacy Policy.”
- Click “EULA” to access a digital version of the “End User License Agreement.”
- Click “Licenses” to view third party open-source software that may be used within the app. We appreciate, recognize and thank the open-source community.
4.8 Customizing Your Experience
You can customize your home screen and select your favorite app icon.
To change the home screen or app icon, from the “More Menu” navigate to the “Customize” page. You will see several design options to select. This is made available after completing your first session.
Note:
You may change the app’s icon back at any time by navigating to “Customize” found in “More Menu.”
5. Completing a Session
5.1 Starting a Session

On the Home Dashboard, the “Start” button will allow you to begin your session.
Click “Start” to begin your session.
5.2 Enter your PIN
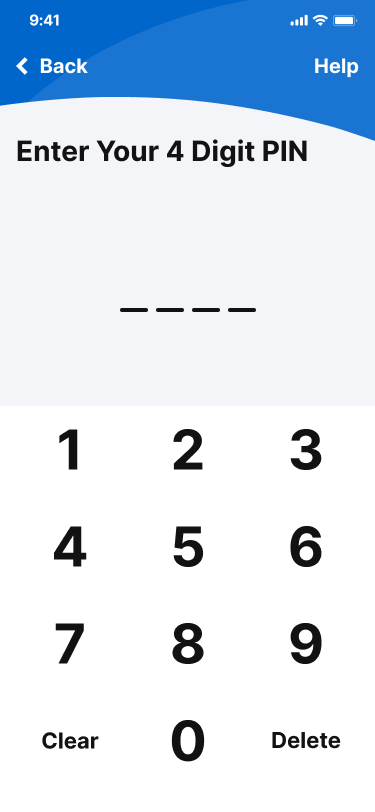
The app will prompt you to enter your four (4) digit PIN. This is used for security purposes.
You have five (5) attempts to enter your PIN correctly. After five (5) failed attempts, you will need to wait fifteen (15) minutes before you re-attempt to enter your PIN.
Enter your PIN to continue.
5.3 Device Handoff

A companion, which is someone you trust such as a partner, caregiver or family member, will need to take a photograph of your eye. Hand the device over to your companion to collect the image of your eye.
5.4 View the Timeline

The app will present the timeline of the activities to be completed in order to complete the full session.
Once all activities are complete, the session will be complete.
Click “Start” to begin the session.
5.5 Complete Vision Activities
Each vision activity will have its own instructions, User Manual and Product Label available for review in the app. Please review the instructions and read each User Manual and Product Label before starting the activity. If you have any questions, please contact your study team at your site. If you do not have this information, select the “Support” button and follow the details provided. Please ensure you take the activities as instructed by your eyecare professional.
5.6 Session Complete
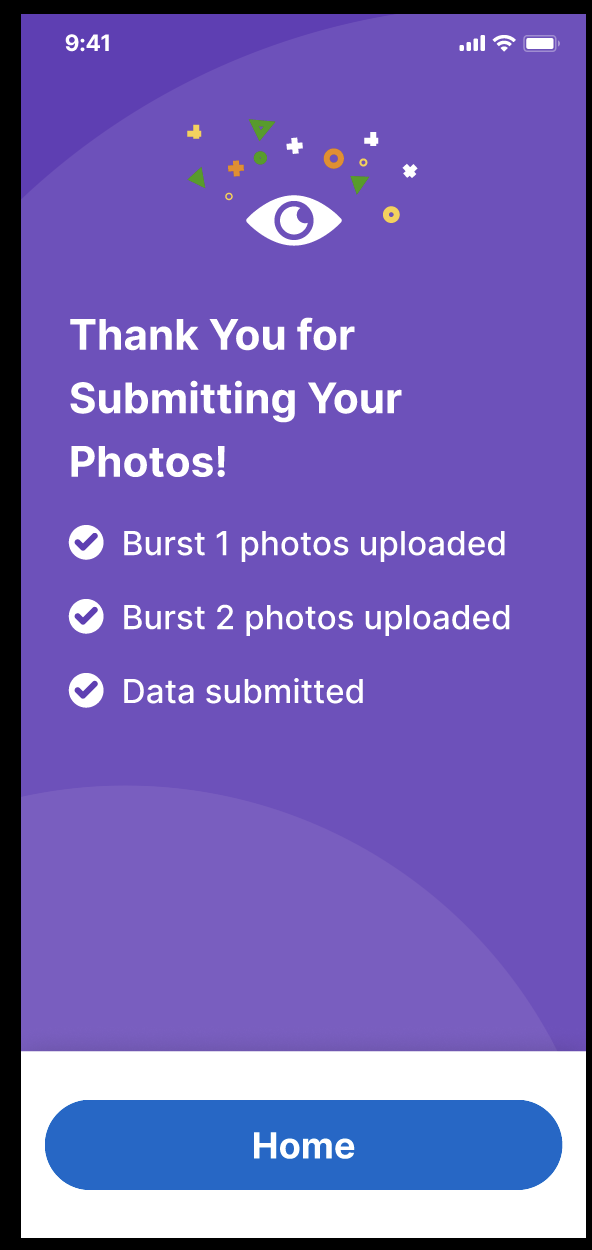
Congratulations! If you are seeing the “Session Complete” screen, you have completed the activity session.
This screen will confirm completion of the image capture session and that the photos captured during the session have been uploaded to the server.
Click “Home” to navigate back to the home dashboard.
Note:
Data may not be uploaded if your device is in offline mode. Please ensure the app is connected to the internet so that your results will be uploaded automatically.
See Section 1.3 to learn more about offline mode.
6. Additional Information
6.1 Contact Us
Should you have questions or concerns about the activity or the application, please contact your study team at your site. If you do not have their contact information, select the “Support” button and follow the details provided.
6.2 Questions
Your eyecare professional should provide instructions about the activity. For more information, or if you have questions about these instructions, contact your study team at your site. If you do not have their contact information, select the “Support” button and follow the details provided.
6.3 Your Rights
We value your trust and the protection of your data is important to us. Please review the application’s privacy policy for information about how data is collected and used. If you have any questions regarding privacy, or about our practices, please contact us using the “Contact Us” button.
6.4 User Manual Information
Document Number: IFU006
Revision: A
Date of Issue: 2021-11-11
© F. Hoffmann-La Roche Ltd. 2021. All rights are reserved. Reproduction or transmission in whole or in part, in any form or by any means, electronic, mechanical or otherwise, is prohibited without the prior written consent of the copyright owner. Copyrights and all other proprietary rights in any software and related documentation ("Software") made available to you rest exclusively with Roche, its affiliates, or its licensors. No title or ownership in the Software is conferred to you. Use of the Software is subject to an end user license agreement. To the maximum extent permitted by law, you shall not decompile and/or reverse engineer the software For research purposes only. Please contact your eyecare professional if you have any questions regarding how the results of this activity will and will not be used. If you experience changes in your vision; consult your eyecare professional immediately. Do not perform the activity without prior assessment by your eyecare professional or any part thereof. Not for diagnostic, monitoring or therapeutic purposes or in any other manner for regular medical practice.